Today, many of the units coming in for calibration don’t have a GPIB interface. All they have are a Universal Serial Bus (USB) or a TCP/IP Local Area Network (LAN) interface. When connected to the computer via USB, we discover our IT department has locked us, mere mortals, out of the computer so we can’t install the driver for the Unit Under Test (UUT). When connecting the UUT to the LAN, it can’t be found because the Media Access Control Address (MAC Address) is not authorized on the network, so the only way left to calibrate the UUT is manually!
There is a better way! It will require a little cooperation with IT; nothing crazy as giving you administration rights or access to critical systems, just the simple idea of creating a mini-calibration network that allows a workstation to communicate with the UUT and maybe a few other standards.
The idea is simple. Computers are not limited to just one Network Interface Card (NIC); they can actually have multiple NIC cards installed. For example, most laptops have both a hard-wired LAN connection and a wifi connection.
To communicate with a UUT or other hardware using our mini-calibration network, all we need to do is to add another hard-wired NIC card to our workstation. This is easily done with a direct-wired connection or the use of an ethernet hub or switch.
There are only a few steps to setting up a mini-calibration network between the workstation and hardware. First, the IP address can’t interfere with the company’s main network. Most company LANs are set up using a 10.x.x.x network or a 192.x.x.x network. So when setting up your mini-calibration network, you have to use the IP address range not used by the company’s main network.
For example, my company uses the 10.x.x.x, so my mini-calibration network will use a 192.168.1.x set of TCP/IP addresses. This will give me the ability to add up to 253 instruments in my mini-network where x is the unique address of the device. (Not so mini compared to the 32 instrument limit of GPIB.)
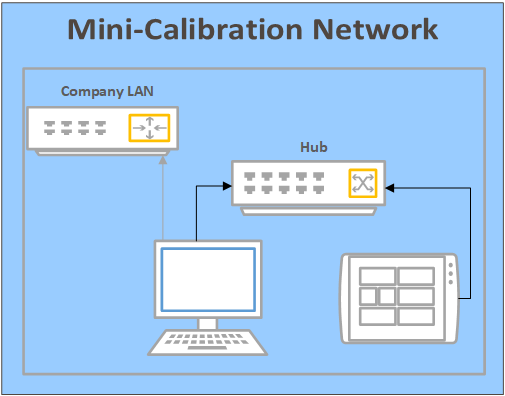
I recommend using a USB-NIC card. They are easy to use and you can think of it like a USB-GPIB controller. I also recommend using an ethernet hub to connect between the workstation and the UUTs/other hardware.
When the USB-NIC is connected, the computer windows will automatically set up the device to use Dynamic Host Configuration Protocol DHCP. If you don’t have admin rights you may need a little help from IT to change NIC’s configuration.
On Windows 10 in the control panel, you can set a specific address by double clicking on the “Network and Sharing Center,” then clicking on the change adapter settings. Find the USB-NIC and right-click it and select Properties. You will have to have administrator rights to the workstation. In the popup window find “Internet Protocol Version 4 9TCP/IPv4,” then select Properties. This may be different on your computer/operating system, but the concept is the same.
Once you get the to properties window, most likely the “Obtain IP address automatically” will be selected. We need to change that and select “Use the following IP Address.” This is where you manually set the workstation’s IP address. Once the IP address is selected, the Subnet Mask and Gateway should be enabled for editing.
I set my workstation up as follows: IP address to “192.168.1.254,” the Subnet Mask to “255.255.255.0,” and leave the Default Gateway blank. It is important to note, because this mini-calibration network is only connected to the workstation, you can set all your workstations up the same way.
Once the workstation is set up, and connected to the hub, now you can set up the UUT. There are 253 addresses ranging from “192.168.1.1” to “192.168.1.253” that can be used for instrument control.
I am going to set my UUT IP Address to “192.168.1.1” and the Subnet Mask to “255.255.255.0.” Each UUT will be different and you will have to read the manual for the specifics. Once done, you should be able to communicate with the UUT.
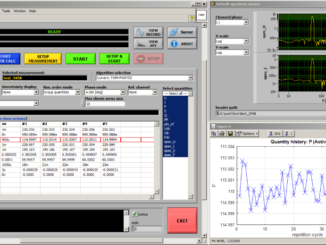
Now you can test your connection using the Command prompt. Open a Windows Command prompt by clicking on the Windows start icon and typing “Command Prompt.” When open, type “Ping 192.168.1.1.” If everything is working correctly, the UUT should respond and you are ready to calibrate the UUT. In the next issue, I will cover setting up VISA using NI MAX.